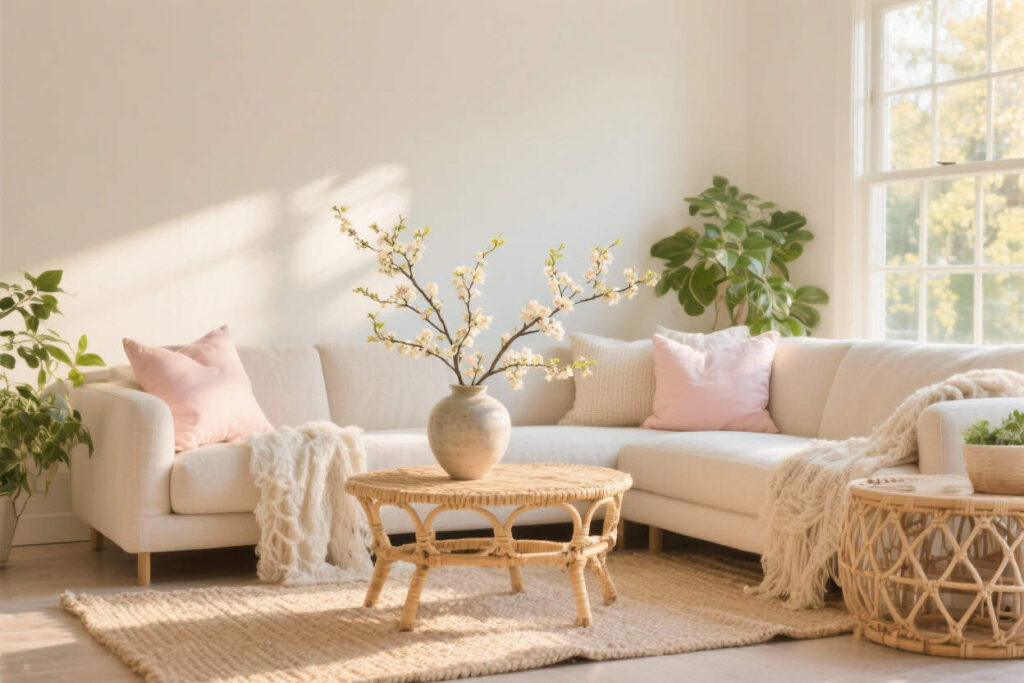
What Actually Makes a Room Look Expensive? (It’s Not What You Think)
Before we get into the ideas, it’s worth talking about why some rooms look designed and others don’t — even when the budget is the same.
Most people try to fix their rooms by buying new furniture. That’s usually the most expensive option and often the least effective one. A new sofa in a badly lit room with random accessories still looks like a badly decorated room with a new sofa.
The three things that actually transform a space are lighting, layers, and a focal point. Get warm lighting and suddenly the room feels inviting. Add layers through rugs, throws, and cushions and the space feels considered. Give the room one strong focal point — a gallery wall, a painted accent wall, a statement lamp — and the eye has somewhere to go. Everything else just follows from there.
Keep that in mind as you read through these 13 ideas. The goal isn’t to replace what you have. It’s to change how it feels.
Budget Bedroom Makeover Ideas
The bedroom is the room most people want to change first, and it’s also one of the easiest to transform without spending a lot. A few small changes to the lighting, the wall behind the bed, and the textiles on it can make the whole thing feel brand new.
1. Dark Moody Bedroom Transformation — $200

This is one of the most dramatic bedroom makeovers you can do on a budget, and the results look like something out of a design magazine. The idea is simple: commit to one deep, moody wall colour and build the rest of the room around it.
In the before photo, the room is plain white with basic furniture — nothing wrong with it, but nothing interesting either. In the after, the same room feels like a completely different space. Deep forest green on the back wall behind the bed changes the entire mood. Edison-style string lights draped above the headboard add warmth without any electrical work. A chunky cream boucle throw over the foot of the bed and two linen-covered pillows pull the look together. A rattan side table with a candle, a stack of books, and a small plant finishes it off.
Total spend: around $200, broken down as one tin of paint ($35), a string light set ($22), boucle throw ($48), two cushion covers ($24), rattan side table ($45), and a few small accessories ($26).
For renters who can’t paint: swap the painted wall for a large removable peel-and-stick wallpaper panel in a deep tone. Brands like Tempaper and Chasing Paper make panels that peel off cleanly and leave no mark. The effect is almost identical.
This is one of those cheap bedroom makeover ideas that genuinely looks like it cost ten times more than it did. The key is committing to the dark colour rather than trying to soften it too much. Trust the process.
2. DIY Fluted Wood Panel Feature Wall — $60

Fluted walls are everywhere in high-end interior design right now, and the good news is that they’re one of the most achievable DIY home decor projects you can do at home. You don’t need any woodworking skills. You don’t need special tools. You need MDF slat strips, wood glue, sandpaper, and a tin of paint.
The process is straightforward: measure your wall and work out how many strips you need with a small gap between each one, glue them vertically to the wall, fill the gaps and nail holes with a little joint compound, sand smooth, and paint the whole thing in one go so the wall and the strips are the same colour. The paint unifies everything and makes the texture look intentional rather than DIY.
Warm side lighting is what brings fluted walls to life. In the image, a rattan pendant light casts soft shadows across the vertical grooves, creating a beautiful dimensional effect that looks far more complex than it actually is. Pair it with a linen duvet, simple pillows, and a trailing plant on a floating shelf above the bed and you have a bedroom that looks like it belongs in a boutique hotel.
Total cost: around $60 in materials. This is one of the best budget bedroom upgrade ideas if you own your home or have a landlord who’s okay with wall fixes on move-out. Most renters can also do this if they fill and repaint on the way out.
3. The Bedroom Lighting Swap That Changes Everything

Of all the affordable bedroom decor ideas in this post, this one might be the easiest to execute and the most impactful dollar for dollar. Changing your bedroom lighting costs nothing if you already have lamps, and under $60 if you’re starting from scratch.
The image shows the same bedroom under three different lighting setups. The top panel has the standard harsh overhead ceiling light on. The room looks flat and clinical — not a place you’d want to relax. The middle panel shows the ceiling light off, replaced by a warm-toned arc floor lamp next to the bed and a plug-in wall sconce above the nightstand. The transformation is dramatic. The room instantly looks warmer, more considered, and more expensive. The bottom panel shows the same room with Edison string lights strung along the headboard wall and an LED strip light behind the bed creating a soft amber glow. Three different bedrooms — same furniture, same walls, just the light changed.
Everything in this setup is plug-in. No electrician. No rewiring. No drilling into ceiling junction boxes. That makes it perfect for renters and anyone who wants a fast, reversible upgrade.
The single most effective move is getting rid of the overhead light as your main source of illumination at night. Use it in the morning. For evenings, switch to lamps placed at eye level or lower. Warm bulbs (2700K) are what give rooms that golden, inviting quality you see in design photos.
4. How to Pick a Bedroom Accent Wall Colour — 7 Options Compared

One of the most common questions people have when planning a bedroom refresh is which accent wall colour to go with. The image here makes it simple. It shows the exact same bedroom with seven different painted accent walls behind the bed: forest green, deep terracotta, navy blue, dusty sage, rich burgundy, warm blush, and charcoal grey. Same oak bed frame. Same cream linen duvet. Same plant on the nightstand. Only the wall colour is different.
Looking at them side by side tells you more than any colour chart ever could. Forest green makes the room feel grounded and natural — it works especially well in rooms with wood furniture. Deep terracotta brings warmth and works beautifully in north-facing rooms that don’t get much natural light. Navy blue creates a sophisticated, moody atmosphere that pairs well with brass or gold accents. Dusty sage is calm and gender-neutral, and it makes small rooms feel larger rather than smaller. Rich burgundy is bold and dramatic but surprisingly easy to live with when used on a single wall. Warm blush is soft and romantic without being overtly feminine. Charcoal grey is the most versatile — it works with almost everything and makes other colours in the room pop.
A single tin of sample paint costs around $5–8. Paint a large swatch (at least 30cm square) directly on the wall and live with it for 48 hours before committing. The colour will look different in morning light, afternoon light, and evening lamplight — and you want to love it in all three.
Living Room Refresh Ideas Under $200
The living room is the hardest room to improve on a budget because it’s the biggest and the one you spend the most time in. But it’s also the room where small changes — a rug, better curtains, some wall art — have the most visible effect. These four budget living room makeover ideas cover renters and owners alike.
5. Renter-Friendly Living Room Makeover — $150, Zero Permanent Changes

If you rent your home, you’ve probably felt the frustration of wanting to make a space feel like yours when you’re not allowed to change anything permanently. This living room transformation proves you don’t need permission to have a beautiful home.
Everything in this makeover is fully reversible. The terracotta geometric pattern on the feature wall is removable peel-and-stick wallpaper — it peels off cleanly in one piece with no residue left behind. The gallery wall is hung entirely on Command strips rated to hold picture frames. The sage green second-hand sofa just needed a good clean and two new cushions. The jute rug sits on top of the existing carpet. The fiddle-leaf fig in a wicker pot is just a plant in a basket.
Total spend: under $150. The removable wallpaper panel is the biggest cost at around $65–80 for a large section, but it’s the thing that transforms the space most dramatically. Everything else — the rug, the plant, the cushions, the Command strip gallery frames — adds up to the rest.
The best brands for peel-and-stick wallpaper are Tempaper, Chasing Paper, and RoomMates. All three are specifically designed for renters and come off walls without damage. Measure your wall carefully before ordering, and always buy 10–15% more than you think you need.
Command strips are rated by weight. The large picture-hanging strips hold up to 3.6kg per pair. For most frames, two pairs per frame is more than enough. Space them evenly, press firmly for 30 seconds, wait an hour before hanging.
6. Build a Gallery Wall Using Free Printable Art — $0 for the Art

Wall art is one of those things people spend too much money on when they don’t need to. The gallery wall in this image is made up entirely of downloaded and printed art — not a single piece was paid for. The frames came from a charity shop and a discount home store, mixed on purpose for variety.
The art includes minimal botanical line drawings, a black and white architectural sketch, an abstract ink wash, a vintage map detail, and a soft watercolour floral. All of it is available for free. Here are five places to find high-quality free printable artwork right now: The Metropolitan Museum of Art’s open access collection at metmuseum.org has over 400,000 images free to download. Rawpixel has thousands of vintage botanical and artistic illustrations. Unsplash has beautiful photography prints. Artvee collects public domain fine art. Canva’s free plan has hundreds of printable art templates.
For the arrangement: use a mix of three frame sizes — 8×10 as your largest, 5×7 as your medium, and 4×6 as your smallest. Mix frame finishes intentionally. In the image, thin black metal frames sit next to natural oak and white frames. The mix looks curated rather than random because the prints inside all share a similar colour palette — soft naturals, warm creams, and muted tones.
Print at home on matte photo paper for the best result, or send to a local print shop for larger sizes. A set of 9 frames from a discount store typically costs $25–40. The art costs nothing.
7. The Curtain Trick That Makes Every Ceiling Look Taller

This is one of those interior design tips that sounds almost too simple to work until you see it. The before-and-after image is genuinely surprising. It’s the same room, the same curtains, and the same window — the only thing that changed is where the curtain rod is mounted.
In the before photo, the rod is mounted just above the window frame. The curtains hang from there to the floor. The room looks like a normal room. In the after photo, the rod is mounted 4 inches below the ceiling. The same curtains hang from much higher and pool slightly at the floor. The ceiling looks dramatically taller. The window looks larger. The entire room feels more spacious and more expensive.
The rule is simple: mount your curtain rod as high as possible, as close to the ceiling as you can. Then use the longest curtain panels available — typically 96 or 108 inches. The curtains don’t need to be wide enough to cover a large window; they just need to be long enough to run from ceiling to floor.
For extra visual height, choose curtains in a light, airy fabric — sheer linen or cotton voile. Heavy fabrics work too but the effect is less dramatic in smaller rooms. Avoid patterns that cut the eye horizontally. Vertical stripes or a solid colour are best for maximising the height illusion.
This works in every room — bedrooms, living rooms, dining rooms. It costs nothing if you already have curtains and just need to move the rod.
8. Complete Living Room Refresh for $200 — Full Product Breakdown

This is the most comprehensive of all the cheap living room makeover ideas in this post. The before is a basic dark grey three-seater sofa in a plain room. The after looks like a styled interior from a home decor magazine, and the total spend is $200.
Here’s exactly what was added and what each piece costs. A cream boucle throw draped over one sofa arm: $28. Four new cushion covers in a mix of terracotta and sage block print: $52 total. A large round braided jute rug to anchor the seating area: $65. A matte black arched floor lamp to the left of the sofa: $45. Three framed A4 botanical prints in matching black frames on the wall above: $35 (frames from a discount store, prints downloaded free). Sheer linen curtains on a ceiling-mounted rod: already covered in the curtain tip above but adds $0 here if you already own them. Wooden tray on the coffee table with two candles and a small trailing pothos: $18.
Total: $243 if you buy everything. Cut the rug and you’re at $178. Cut the lamp and you’re at $133. The point is that even buying a few of these pieces transforms the space. You don’t have to do it all at once.
The sofa was not replaced. Not reupholstered. Not even steam-cleaned in this example. Adding the throw and the cushions to an existing sofa — even a worn one — immediately refreshes it. It’s the single highest-impact thing you can do to a living room without buying new furniture.
Budget Bathroom Makeover Ideas (Renter-Friendly)
Bathrooms are small, which means changes have a big impact relative to their cost. These two bathroom makeover ideas on a budget are both fully reversible and both look like proper renovations when they’re done.
9. Small Bathroom Glow-Up for Under $80

The bathroom before is completely inoffensive — plain white tiles, a standard rectangular mirror, chrome taps, plastic accessories. It’s fine. It’s also completely forgettable. The bathroom after costs less than a tank of petrol to achieve and looks like a completely different room.
Here’s what changed. The small rectangular mirror was swapped for a large round one in a brushed brass frame. This single change has the most impact of anything in the room — a larger mirror makes the space feel bigger, and the round shape adds personality that rectangular mirrors don’t have. The mirror cost $35 from a discount home store. A peel-and-stick marble-effect backsplash tile strip was applied along the wall behind the sink. The sage green ceramic soap dispenser and dish replaced the plastic originals. A small air plant in a terracotta pot sits on the counter. White linen hand towels rolled and placed in a small rattan basket replaced the old hook-hung towels. A simple wooden bath mat replaced the fabric one.
Total: $74. Every single change is removable. The peel-stick tiles peel off with warmth from a hairdryer. The mirror hangs on a standard hook. Nothing is permanent.
Quick tip: the single fastest bathroom upgrade under $15 is a ceramic soap dispenser set and a basket of rolled white towels. It takes five minutes and instantly makes any bathroom feel like a hotel bathroom. Do that first before anything else.
10. Peel-and-Stick Hexagon Tile Backsplash — $60

This is one of the most consistently impressive renter bathroom upgrade ideas because the before and after looks like a complete professional retile. It isn’t. It’s peel-and-stick tiles applied on a Sunday afternoon with no tools, no adhesive, and no grout.
The black hexagonal mosaic tile backsplash in the image is applied on top of the original plain white tiles behind the sink. It took under two hours and cost $58. Paired with a round brushed gold mirror, a matte black faucet cover (also stick-on), and sage ceramic accessories, the bathroom looks like it had a $2,000 renovation.
The application is straightforward but preparation makes a big difference. Clean the existing tiles thoroughly with rubbing alcohol and let them dry completely — any moisture or grease will prevent the adhesive from bonding. Start from the centre tile and work outward so your pattern stays symmetrical. Use a squeegee or a flat credit card to press each tile firmly and eliminate air bubbles. Trim edge tiles with a sharp craft knife and a metal ruler.
When you move out, warm each tile with a hairdryer on low heat for 20–30 seconds before peeling. The adhesive softens and the tiles come off in one piece without damaging the original tiles underneath.
Best brands to look at: Aspect peel-and-stick tiles and Art3d. Both are well-reviewed for adhesion, realistic appearance, and clean removal.
Kitchen Upgrades That Look Like a Full Renovation
A kitchen renovation is one of the most expensive things you can do to a home. A kitchen refresh doesn’t have to be. These two ideas tackle the two things that age a kitchen most: dated cabinet colours and old countertops. Neither requires a single piece of new cabinetry.
11. Paint Your Kitchen Cabinets Without Replacing Them — $150

The before in this image is a very common kitchen situation: oak-finish cabinets that were perfectly fashionable in 2003 and look dated now. The after is a completely different kitchen — same units, same layout, same appliances — just painted in deep sage green with matte black bar pull handles swapped in for the old chrome ones.
The total cost is around $150. The most important thing to get right is the paint. Do not use standard wall paint on cabinets. It will chip within weeks. You need a cabinet-specific water-based enamel. It self-levels as it dries, which means brush marks largely disappear, and it dries to a hard, wipeable surface that holds up to daily use. Brands to look for: Rust-Oleum Cabinet Transformations, Frenchic Al Fresco, or Dulux Trade Satinwood.
The process: remove all cabinet doors and hardware. Clean every surface with a degreaser — kitchen cabinets have years of cooking residue on them and paint won’t stick to grease. Sand lightly with 120-grit sandpaper to give the surface something to bond to. Apply two thin coats of cabinet enamel, sanding lightly between coats with 220-grit. Reattach with new hardware.
The handle swap alone is worth doing even before painting. Replacing chrome or gold handles with matte black bar pulls costs around $2–4 per handle and takes about ten minutes per door. If the paint and handle combo transforms the look, great. If the handles alone do most of the work, you’ve saved yourself a full day of painting.
Sage green is having a long moment in kitchen design — it’s been one of the most-searched kitchen colour ideas for two years running and it shows no sign of fading. Other strong choices: navy blue, warm white, slate grey, or deep olive. Avoid trendy colours that feel very of-the-moment — kitchen paint needs to last at least five years before you’ll want to repaint.
12. Marble Contact Paper Countertop Hack — $45

This one surprises people every time. The close-up image of the contact paper surface looks convincingly like real Carrara marble — the fine grey veining, the slight variation in the white ground, the subtle sheen. It’s not marble. It’s a roll of adhesive vinyl that cost $28.
Contact paper countertop transformations work best on flat laminate surfaces. Avoid applying over textured or heavily patterned existing surfaces — the pattern will show through. The best surfaces are smooth, flat, and clean.
Application technique: measure and cut your pieces to size before removing the backing, leaving a few centimetres of overhang on every edge. Peel back about 10cm of backing at the start, align the paper carefully, and press down firmly working from that edge. Slowly peel more backing as you go, keeping the vinyl flat and using a squeegee or credit card to push out any bubbles. Work slowly. If a bubble appears, peel back to before it and re-lay.
At the edges, fold the paper over the front lip of the counter and trim neatly with a sharp craft knife. For corners, use a heat gun or hairdryer on low to make the vinyl slightly flexible — it moulds around curves and corners without creasing.
Lifespan with normal kitchen use is 2–3 years. It’s heat resistant to around 60°C, so don’t put hot pans directly on it — use trivets. It’s fully removable: warm with a hairdryer and peel back slowly.
The best brands for a realistic marble look: d-c-fix Marble White and Con-Tact Premium. Both are available on Amazon for under $25 for a 2-metre roll, which covers most average kitchen countertops.
High-Impact DIY Projects — Zero Skills Required
These three DIY home makeover ideas are all genuinely beginner-friendly. None of them require special tools, crafting experience, or more than a couple of hours. They’re also three of the cheapest items on this list — combined, they cost under $75.
13. Thrift Store Lamp Flip — $30 Total

Thrift flipping home decor is one of the best ways to get a high-end look for almost nothing, and lamps are the single best item to flip because a bad lamp and a good lamp use exactly the same parts — just a base, a cord, a bulb fitting, and a shade.
The image shows the three stages: a dated brass-and-white table lamp from a charity shop with a $3 price tag on it, the spray paint and new shade laid out for the transformation, and the finished lamp styled on a wooden side table looking like a $90 buy from a design store.
What you need: the lamp ($3–8 from a charity shop or Facebook Marketplace), one can of Rust-Oleum matte black spray paint ($8–12), and a new pleated or drum shade in ivory or cream ($12–18). Total: around $25–38 depending on where you source the shade.
The painting process: remove the shade and bulb. Take the base outside or into a well-ventilated space. Apply two thin coats of matte black spray paint, allowing 20 minutes between coats. A thin coat is a coat where you keep the can moving constantly — if you hold it still, it pools. Two thin coats give a better finish than one thick one. Attach the new shade and that’s it.
Shade sizing: a good rule of thumb is that the shade diameter should be roughly twice the width of the lamp base. A narrow base gets a narrow shade. A wide base gets a wide shade. The shade height should be similar to or slightly taller than the base height.
The Bottom Line on Budget Room Makeovers
None of the rooms in this post required a contractor, a renovation, or a large budget. They required the right approach: changing lighting and atmosphere before replacing furniture, using textiles to add warmth and layers, giving each room one strong focal point, and making smart, targeted choices about where the money goes.
You don’t have to do all 20 ideas. Pick the one room that bothers you most right now. Find two or three ideas from that section. Start this weekend.
The before photos in this post look exactly like most people’s homes right now. The after photos are what those same homes look like after a few hours of work and under $200. The gap between the two isn’t money. It’s just the decision to start.
Which room are you tackling first? Drop it in the comments — and save this post to your home decor board on Pinterest so you can come back to it when you’re ready.