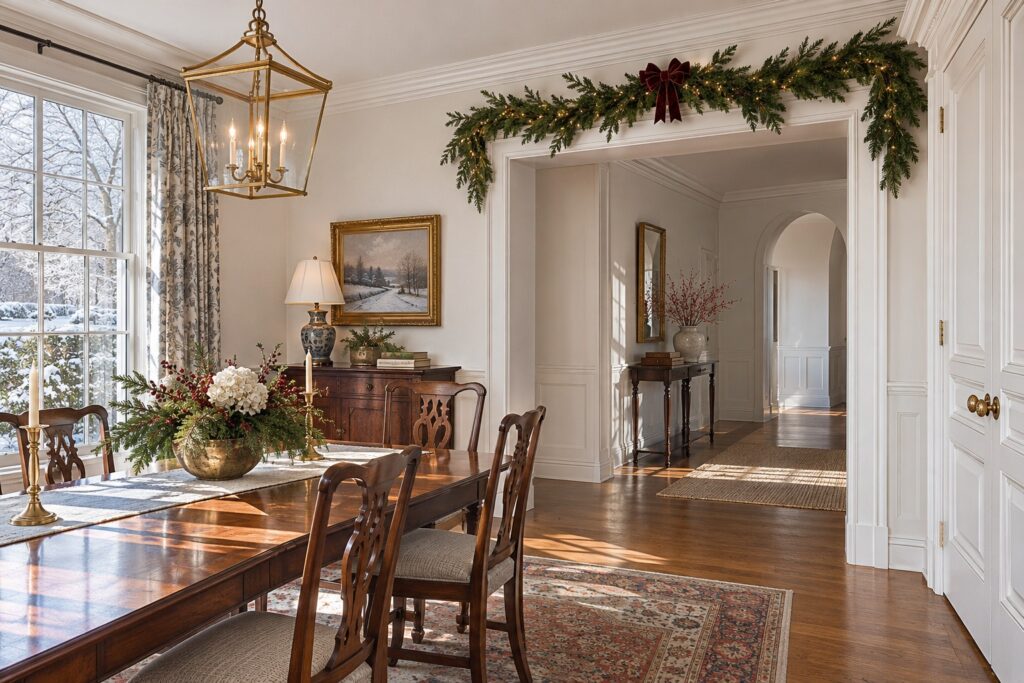
A felt garland can be a line of crisp stars, a row of softly stuffed bulbs, or one long scalloped edge. The construction changes how it hangs. Choose the shape and the amount of sewing first, then make a short sample before cutting enough pieces for the whole room.
These 14 felt Christmas garland ideas use different ways to cut, fold, layer, and join simple shapes. Check the felt label: craft polyester, wool blends, and wool felt do not have identical thickness or stiffness. Keep these projects as decorations rather than toys, with cords and small pieces away from young children, pets, heat, and open flames. Use fixings suited to the surface and the finished garland’s weight.
1. Cut Simple Stars From One Paper Pattern
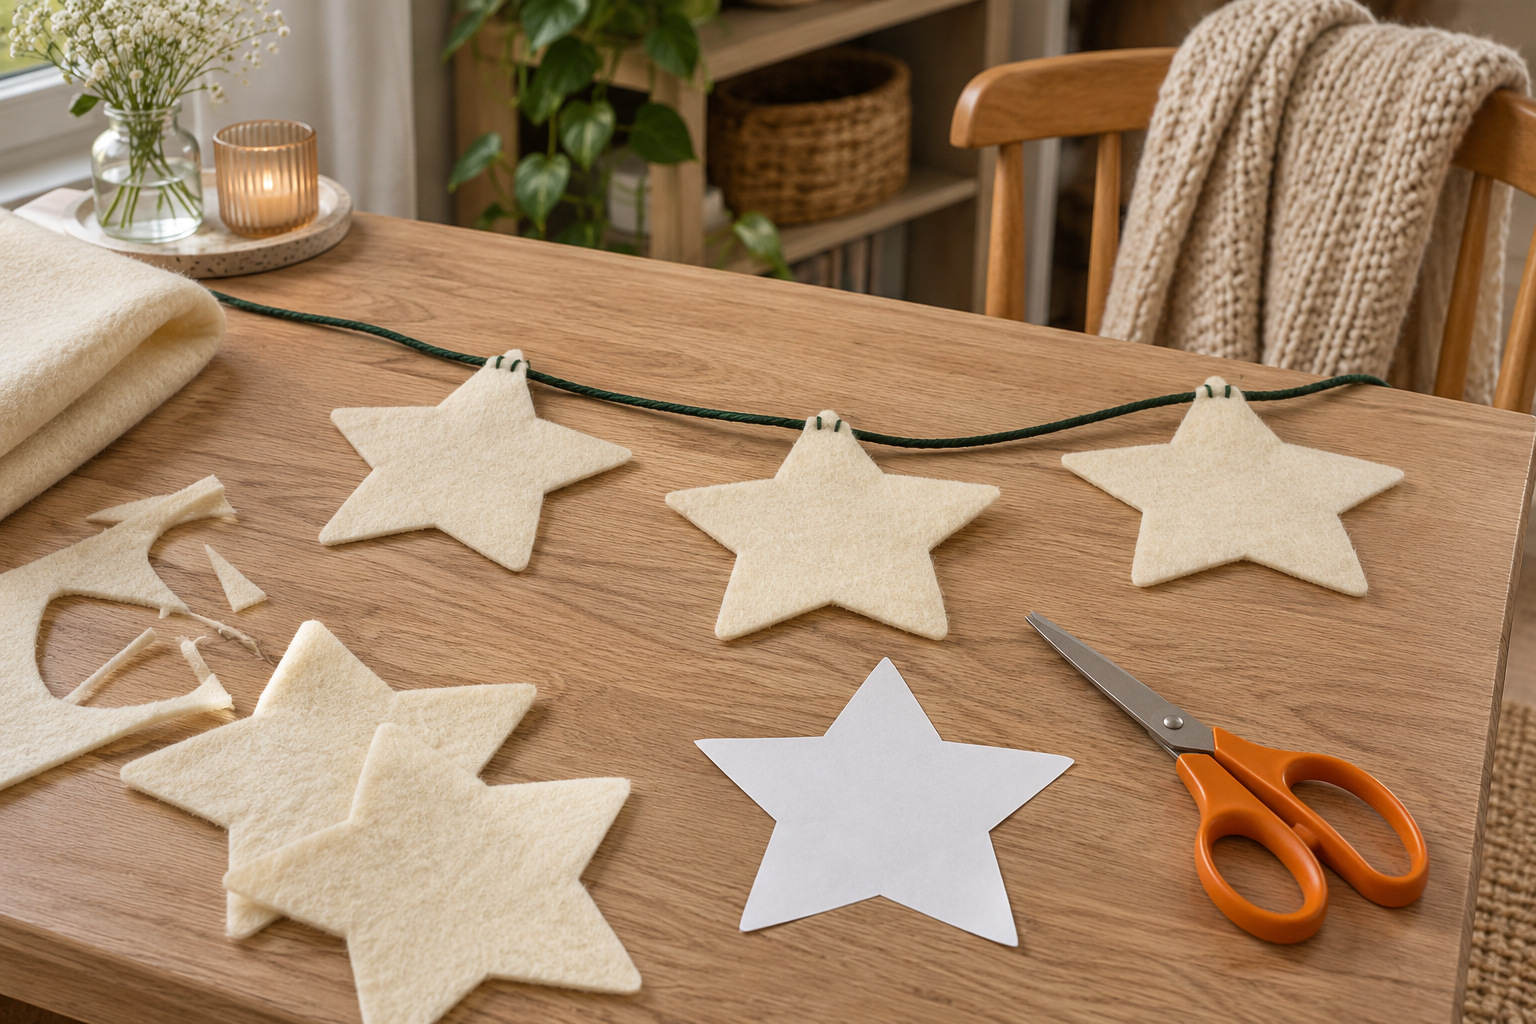
Draw a broad five-point star on paper and cut it out before touching the felt. Lay the pattern on the felt, trace lightly on the reverse, and cut one test star. Wider points are easier to keep clean than long, narrow tips. Place that first star against the wall where the garland will hang so you can judge the size from across the room.
Use sharp fabric scissors for the long edges, turning the felt as you approach a corner. A smaller suitable pair can help with tight inward cuts; do not force a long blade into a notch. Check that the test piece lies flat before repeating the pattern.
Attach the stars to a supporting cord with a few secure stitches through their upper points. Leave visible cord between them so the outline of each star remains clear. Cream stars on a dark green strand make a quiet starting point without requiring decorative stitching on every piece.
For longer felt edges, this 8-inch pair suits broad cuts; use an appropriate smaller tool for tight inward notches rather than forcing a long blade into them.
Compare the fabric scissors (paid link)
2. Layer Two Sizes of Felt Fir Trees
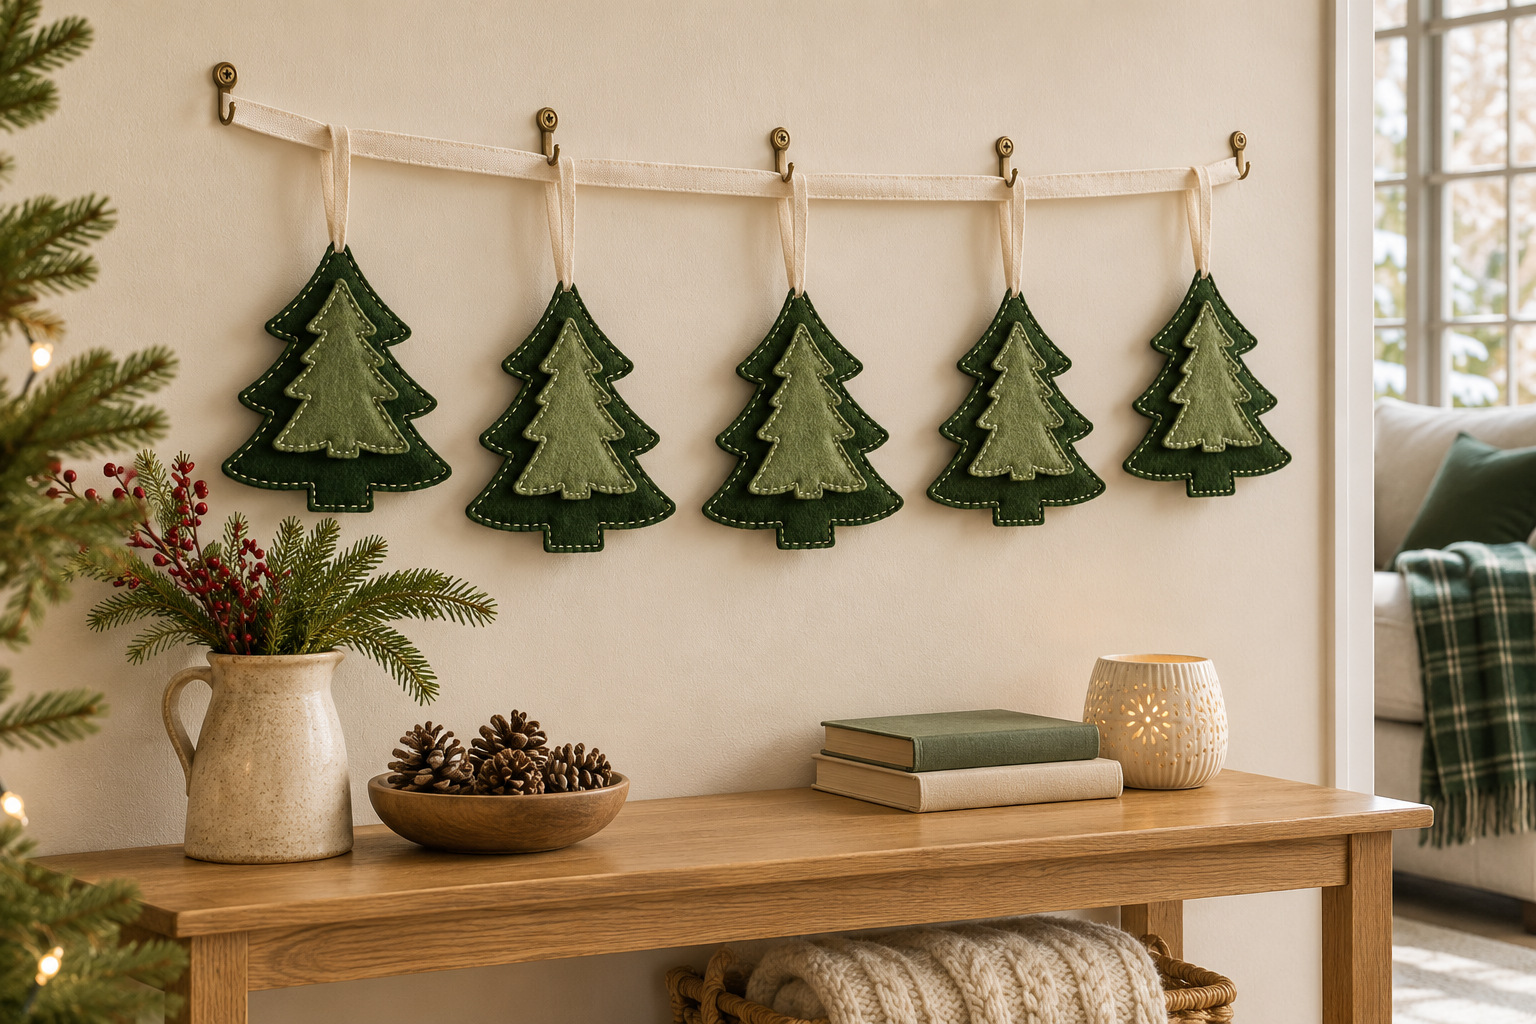
Make a simple tree pattern with broad branches and a short trunk. Cut a smaller tree in a related green, then lay it over a larger silhouette. Move the smaller piece slightly upward so the larger one supplies a narrow border around the branch tips. This gives a flat garland depth without stuffing each tree.
Test the pair on a table before sewing them together. A few small stitches through both layers can hold the center, while the outside branch edges stay separate. Keep the trunk wide enough to survive handling when the garland is packed away.
Hang the trees from their top points rather than stitching the main cord across their middle. On a plain wall above a console, the repeating tops create a clear Christmas line. If you are dressing an opening, these Christmas doorway garland ideas explain how to keep the moving door and passage usable.
3. Fold Felt Tabs Over a Narrow Tape
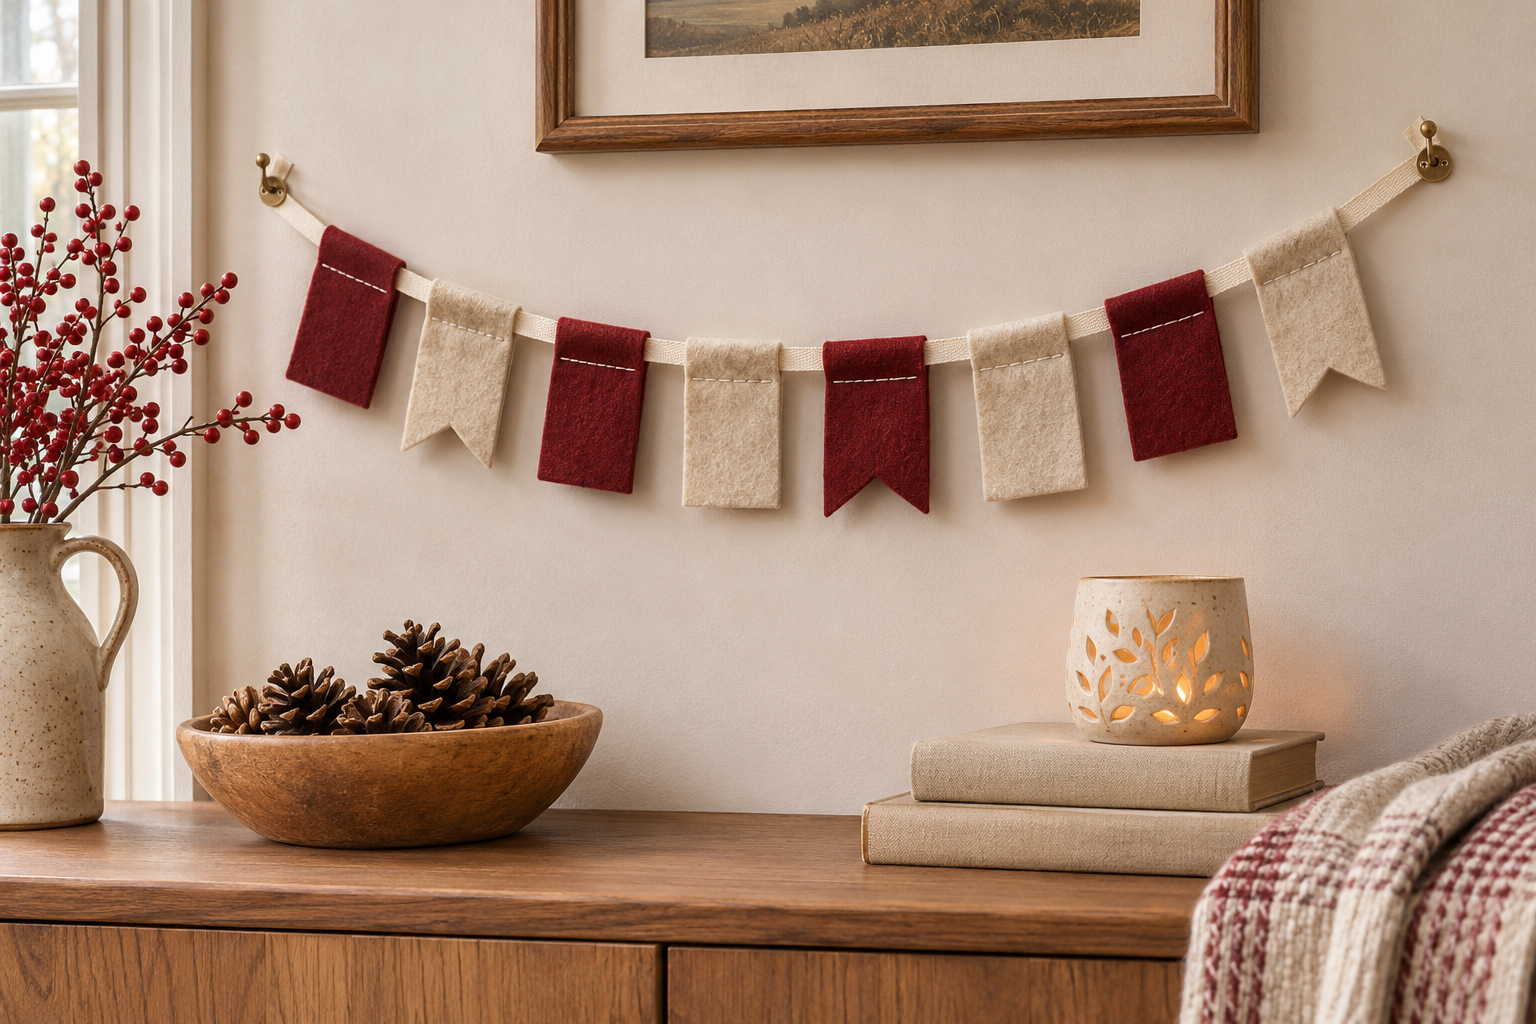
Cut short rectangles and fold each one over a narrow cotton tape. The fold becomes the top of the decoration, with the two lower edges meeting beneath it. You can leave those edges square or cut one broad V into the bottom after folding. Try three tabs first to see how much of the tape should show between them.
Sew through the two layers just below the supporting tape so each tab stays in place. Use felt with enough body to hold the folded shape; a very soft piece may need a different construction. Check that the tape remains flat rather than twisting inside the folds.
Alternate cranberry and oatmeal tabs for a small banner effect. This design reads well across a short wall because the continuous top line keeps all the pieces connected. Leave spare tape at both ends for the attachment method you intend to use.
4. Make Soft Light Bulbs With Contrasting Caps
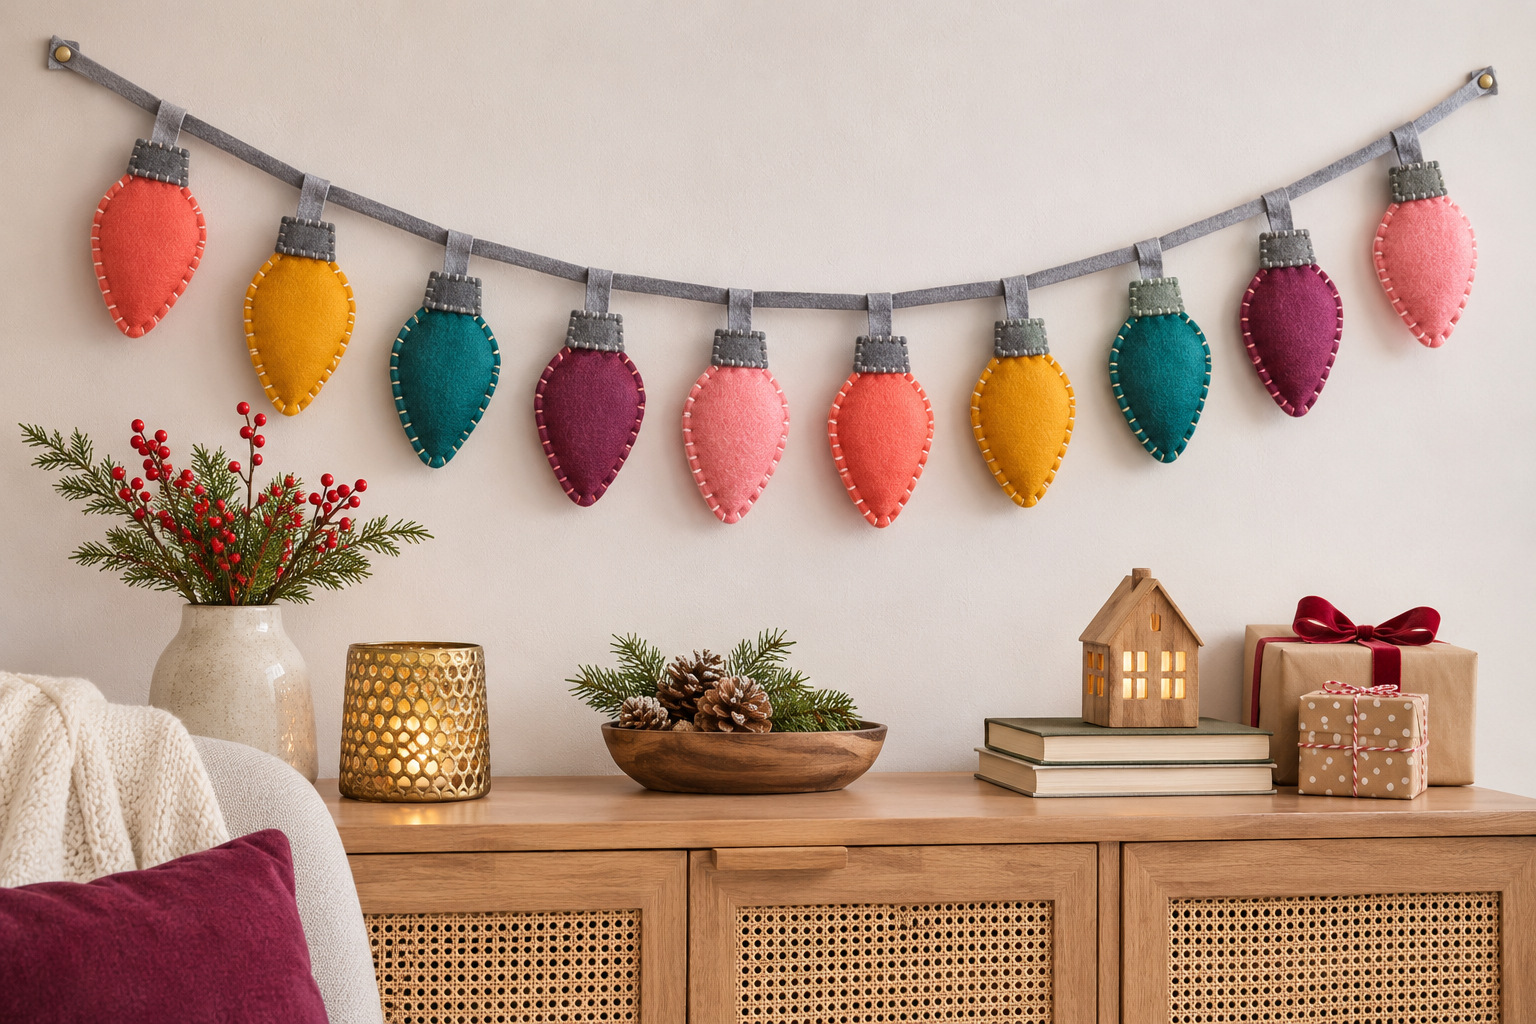
Cut two matching rounded bulb shapes for each decoration and add a small contrasting felt cap at the narrow end. Keep the first pattern generous enough to stitch around without losing the curved outline. A row of teal, mustard, coral, and pink shapes can make a plain sideboard wall playful before any other ornaments are added.
Join each pair around the edge, leaving a small opening for a little suitable craft stuffing. Close the opening after the shape has enough body to read clearly. It should stay light rather than becoming a firm, heavy ornament. Attach the closed shapes securely to a separate supporting tape.
These are pretend bulbs, not covers for real lights. Keep the felt separate from lamps, electrical fittings, and illuminated strings. The stitched caps and the rounded silhouettes provide the light-bulb idea without needing an actual light source.
5. String Stacked Felt Pennies With Open Gaps
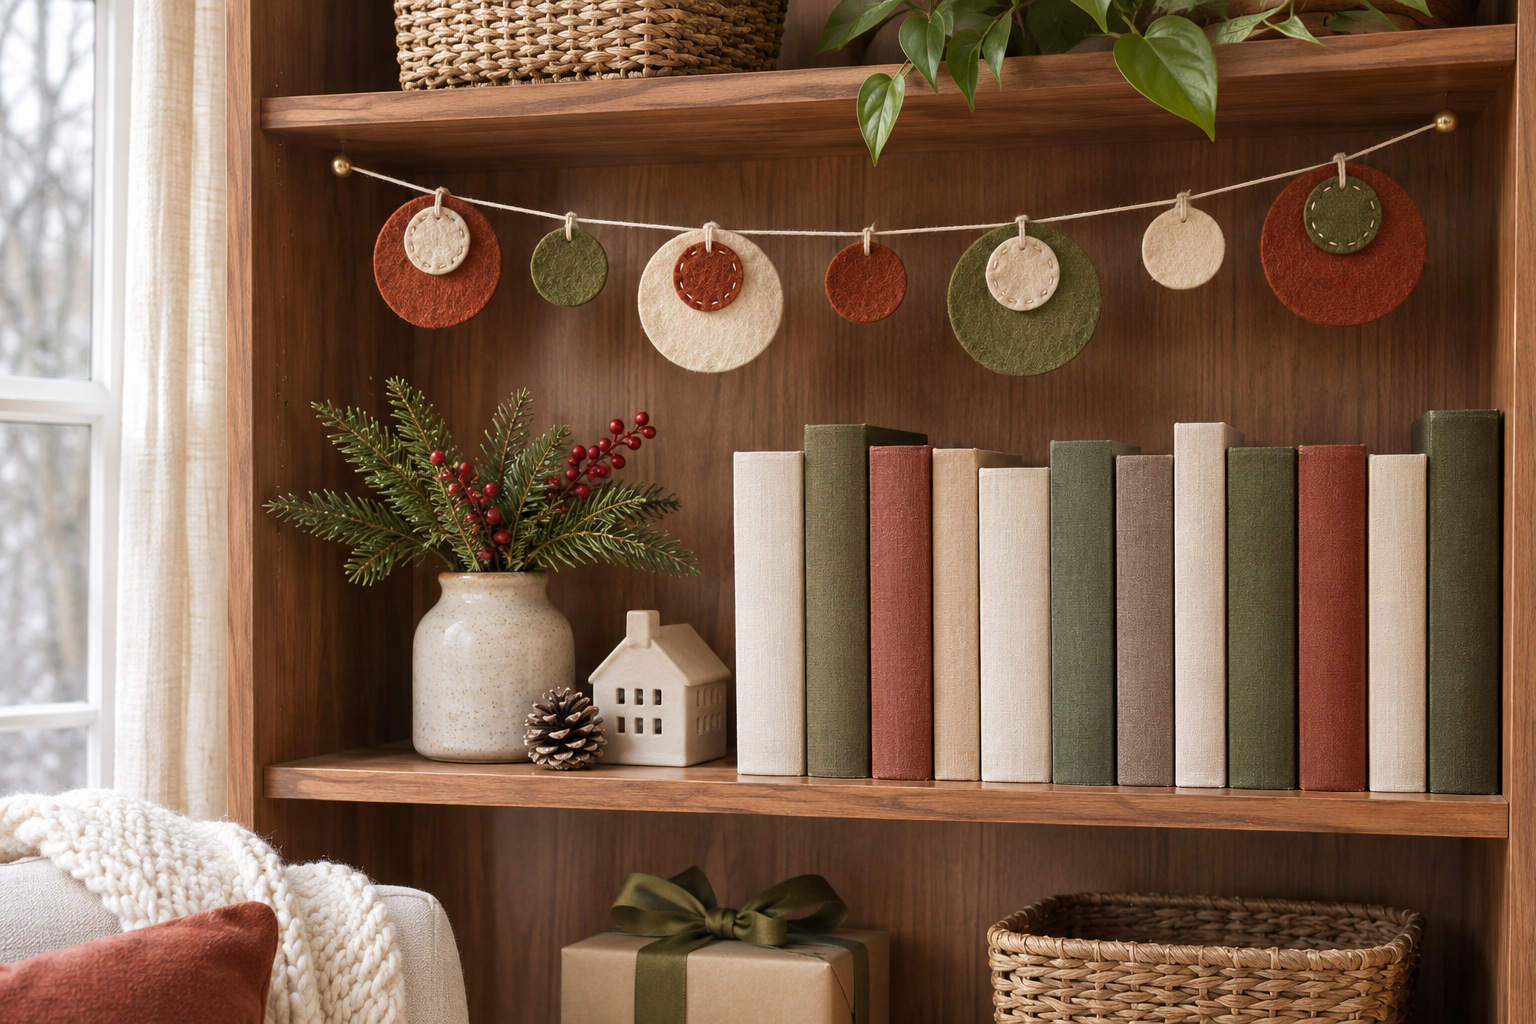
Trace circles in two or three sizes and cut a small batch before assembling them. Place a smaller felt circle over a larger one, then use a few stitches to hold the layers together. Two layers are often enough for the edges to show. A tiny stack is easier to support than a thick bundle of felt.
Try cream over rust, muted green over cream, and one plain rust circle between layered pieces. Lay the whole sequence out before attaching it to the cord. Changing the size occasionally gives the line rhythm without needing another shape.
Attach the circles near their upper edges so they face forward. Leave open gaps instead of packing them tightly together. The small discs can sit high above a bookcase, with the strand kept outside the space where books are lifted out. Do not wrap it around the books or their supports.
6. Stitch Holly Leaves Along a Quiet Green Strand
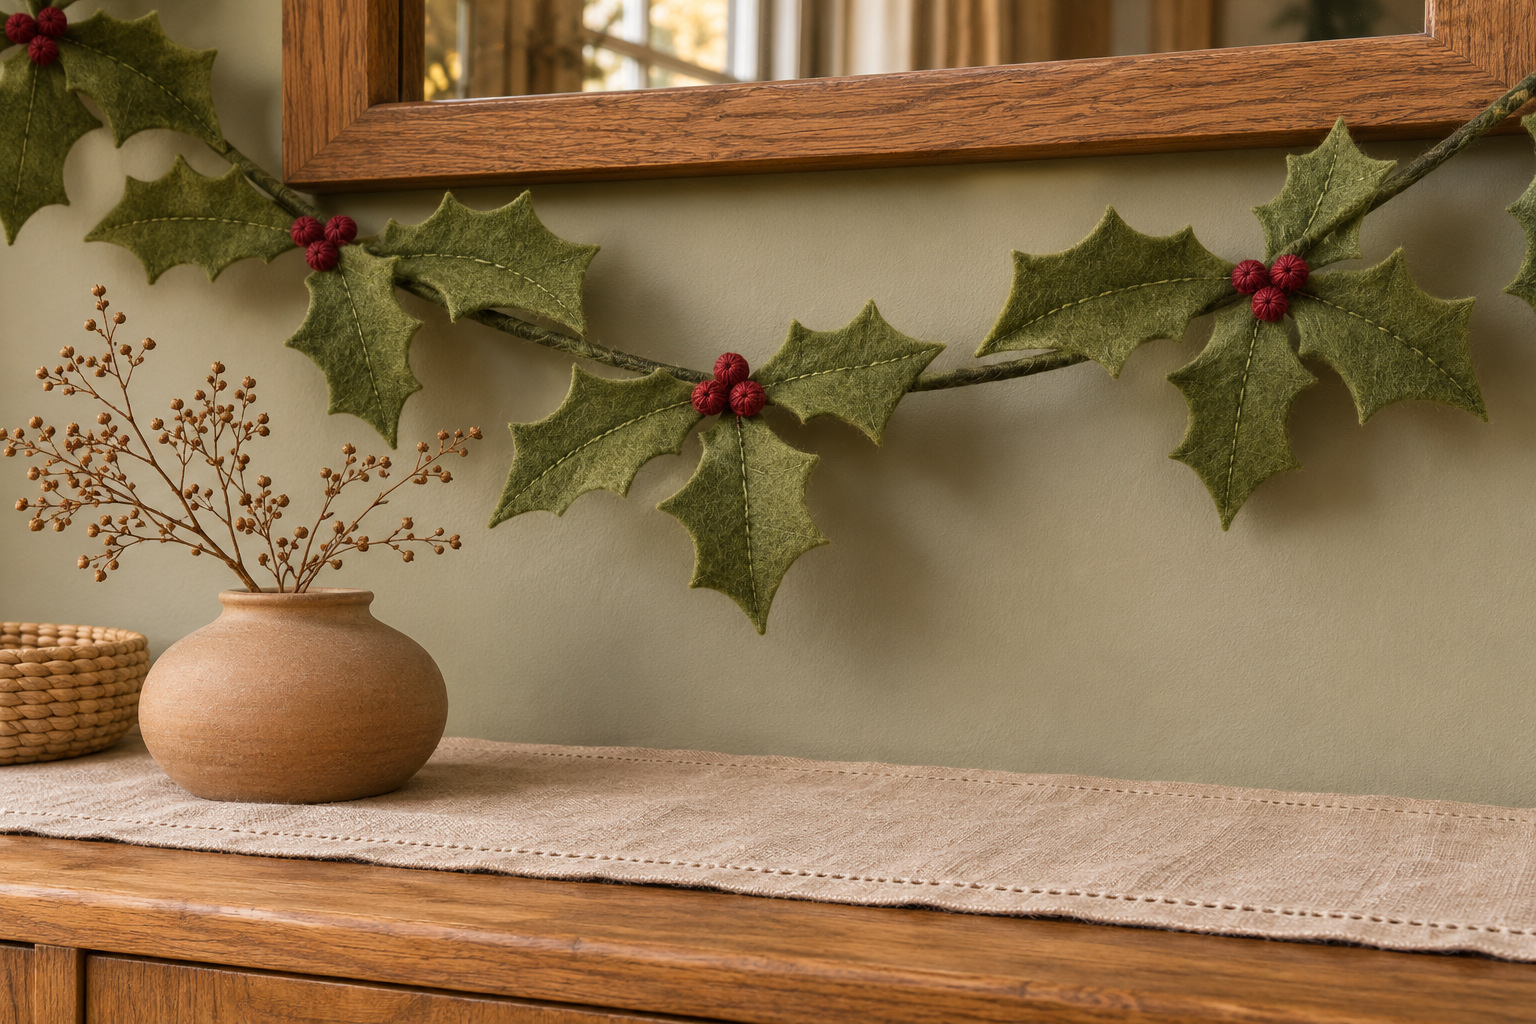
Use a broad holly-leaf outline with only a few clear points. Cut leaves in two muted greens and place them in small pairs along a supporting tape. Turn one pair upward and the next slightly downward so the garland has movement without needing long projecting stems.
Stitch through the leaf bases, keeping their tips free. Red embroidery stitches can suggest berries without adding separate hard beads. Test the thread and felt together on an offcut, especially if the felt is thick enough to make a needle difficult to pass through.
This is a good place to let the textile texture show. A matte leaf garland above a warm wood console can work with a plain linen runner and a broad clay vase. Keep the arrangement sparse so the leaves read as a soft Christmas accent instead of getting lost among real or faux foliage.
7. Give Little Felt Houses Wide Roofs
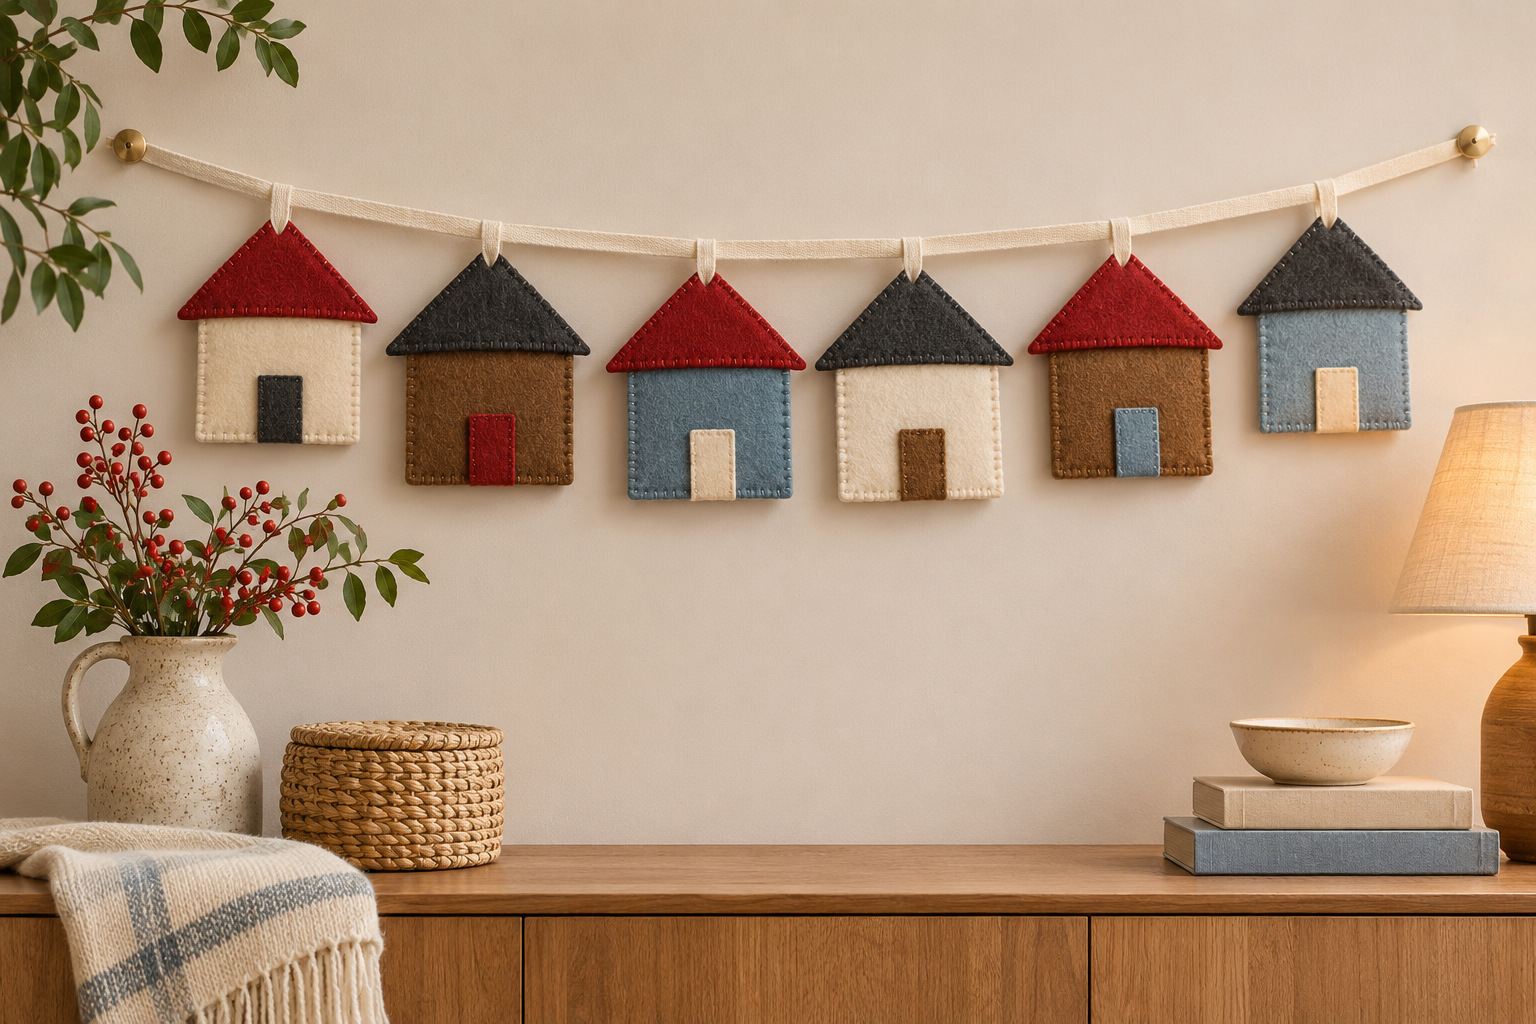
Draw a small house body and a separate roof with a generous overhang. Use a contrasting roof color so the silhouette is readable even when the garland is seen from the side. Before making a whole village, test whether the roof looks balanced over one completed house.
Sew or attach the roof using a fabric adhesive compatible with the felt, following its directions and drying time. Add a simple door or window with a flat felt patch. Skip tiny lettering and many small loose details; the roofline can do most of the work.
Place the houses along a tape with their roof peaks at a consistent height. A short row above a low sideboard gives them a clear horizon. Keep the tape supported independently of delicate picture frames or objects on the furniture below.
8. Turn Small Mittens Into a Paired Garland
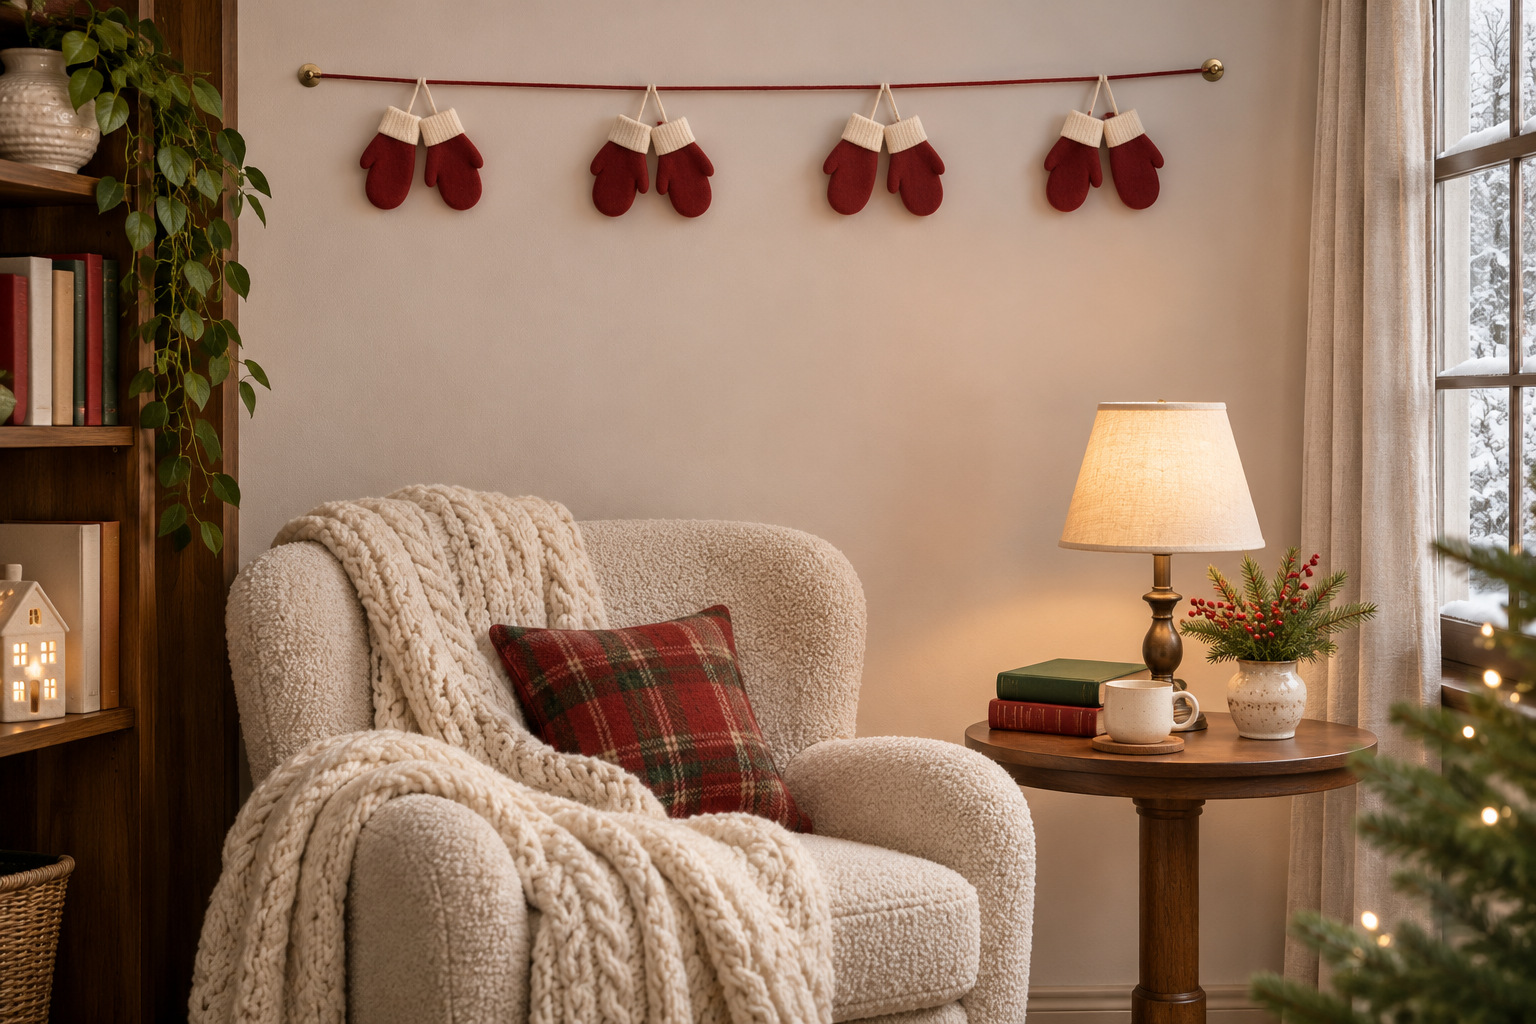
Fold paper and draw a mitten with a broad thumb before cutting matching pieces. Add a separate cuff in a second color. For a softly padded version, join two mitten shapes around their edge with a little craft stuffing inside; for a lighter garland, keep them flat.
Hang the mittens in pairs, with a small gap within each pair and a larger gap before the next one. That spacing makes the pairing visible without adding a long loop of cord between them. Secure the pieces to the main strand so the little mittens do not slide into a pile at the lowest point.
Cream cuffs and muted red mittens can sit above a comfortable reading chair, away from its lamp. Repeat the red in one cushion or folded throw if you want the corner to feel connected. Keep the strand high and separate from anything someone reaches for while seated.
9. Cut One Continuous Scalloped Felt Strip
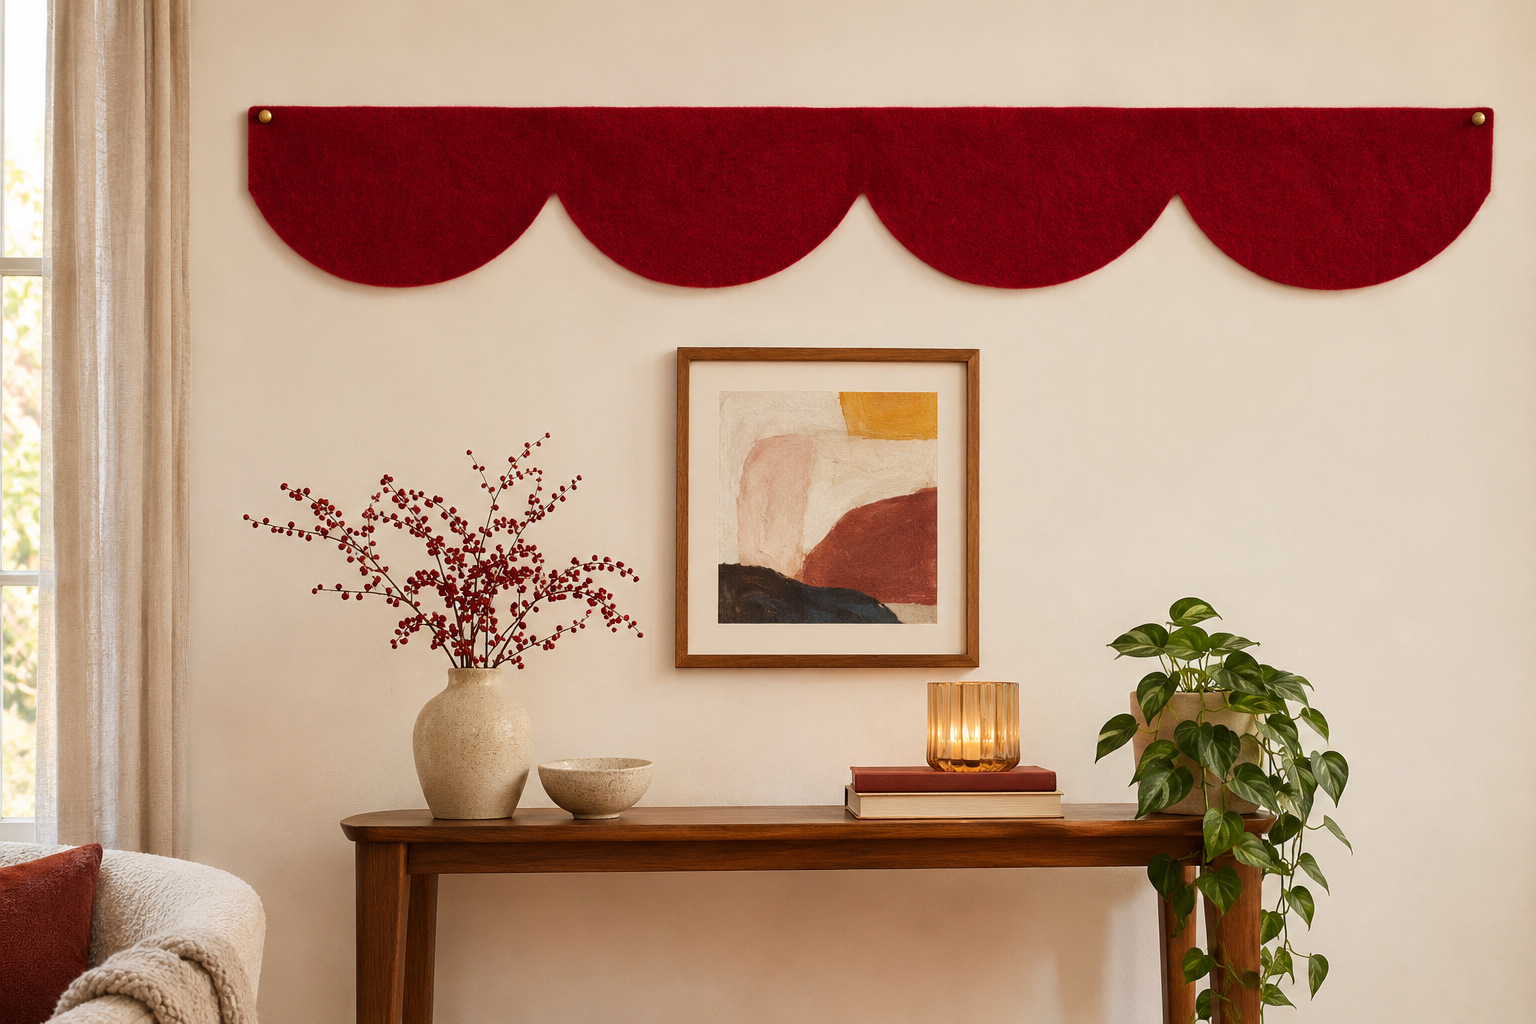
For a scalloped edge, choose a piece of felt long enough for the section you want to decorate. Standard craft sheets make short strips; a longer uninterrupted line needs suitable yardage. Draw a straight top edge and use a paper half-circle to repeat the lower curves consistently.
Cut a short sample to check the depth of the scallops. Broad, shallow curves usually lie more calmly than deep, narrow ones in a flexible material. Keep enough uncut felt above the curves for the strip to remain a single piece.
Fix the straight upper edge along appropriate supports on a plain wall, leaving the scalloped shape fully visible below. Deep red against warm ivory makes a strong graphic line above a small framed print. Use the strip as the wall feature and keep neighboring decorations quieter, rather than adding another full garland over it.
10. Build a Chunky Chain From Felt Loops
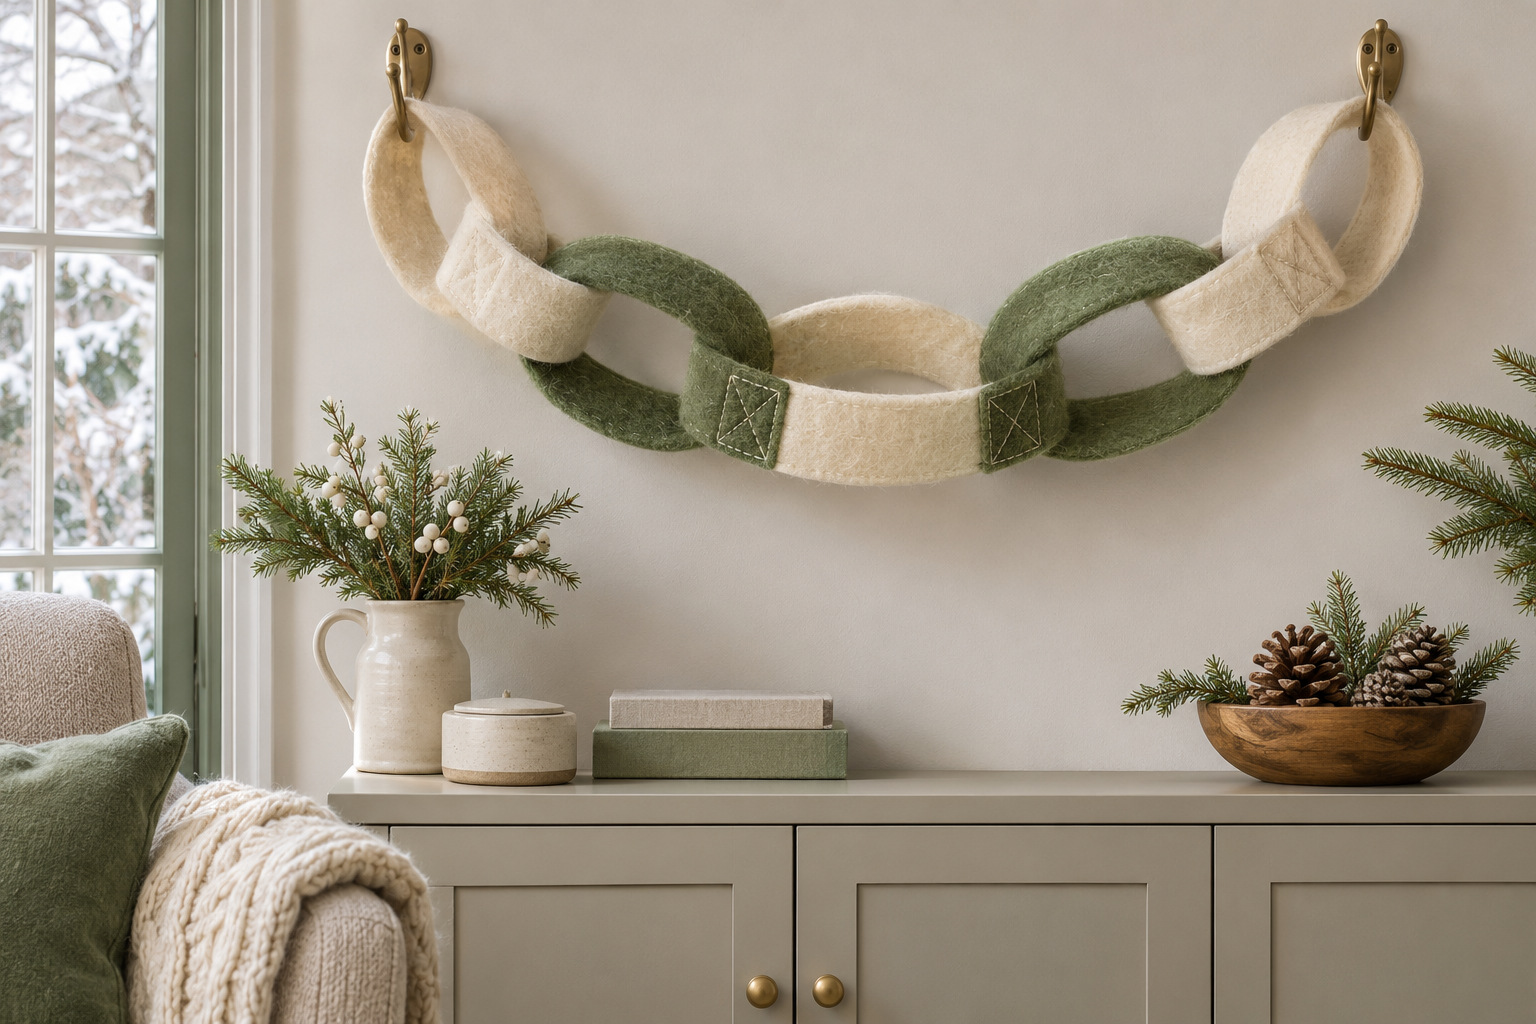
Cut several equal strips and make a three-link test chain. Fold the first strip into a loop and stitch its ends together. Pass the second strip through it before closing the next loop. Felt varies in stiffness, so the sample tells you whether the links keep their rounded shape or collapse into folds.
Use broad strips for a sculptural chain and keep the completed run short enough for its supports. Reinforce the joined ends with a method suited to the material rather than relying on one loose stitch. If the felt is too floppy, choose a firmer piece for this project instead of trying to fill every loop.
The linked construction is also useful to compare with these paper chain Christmas decor ideas. Felt gives the same familiar outline a thicker, softer edge. A restrained two-color chain can be enough above a plain cabinet.
11. Hang Tiny Felt Presents From a Wide Ribbon
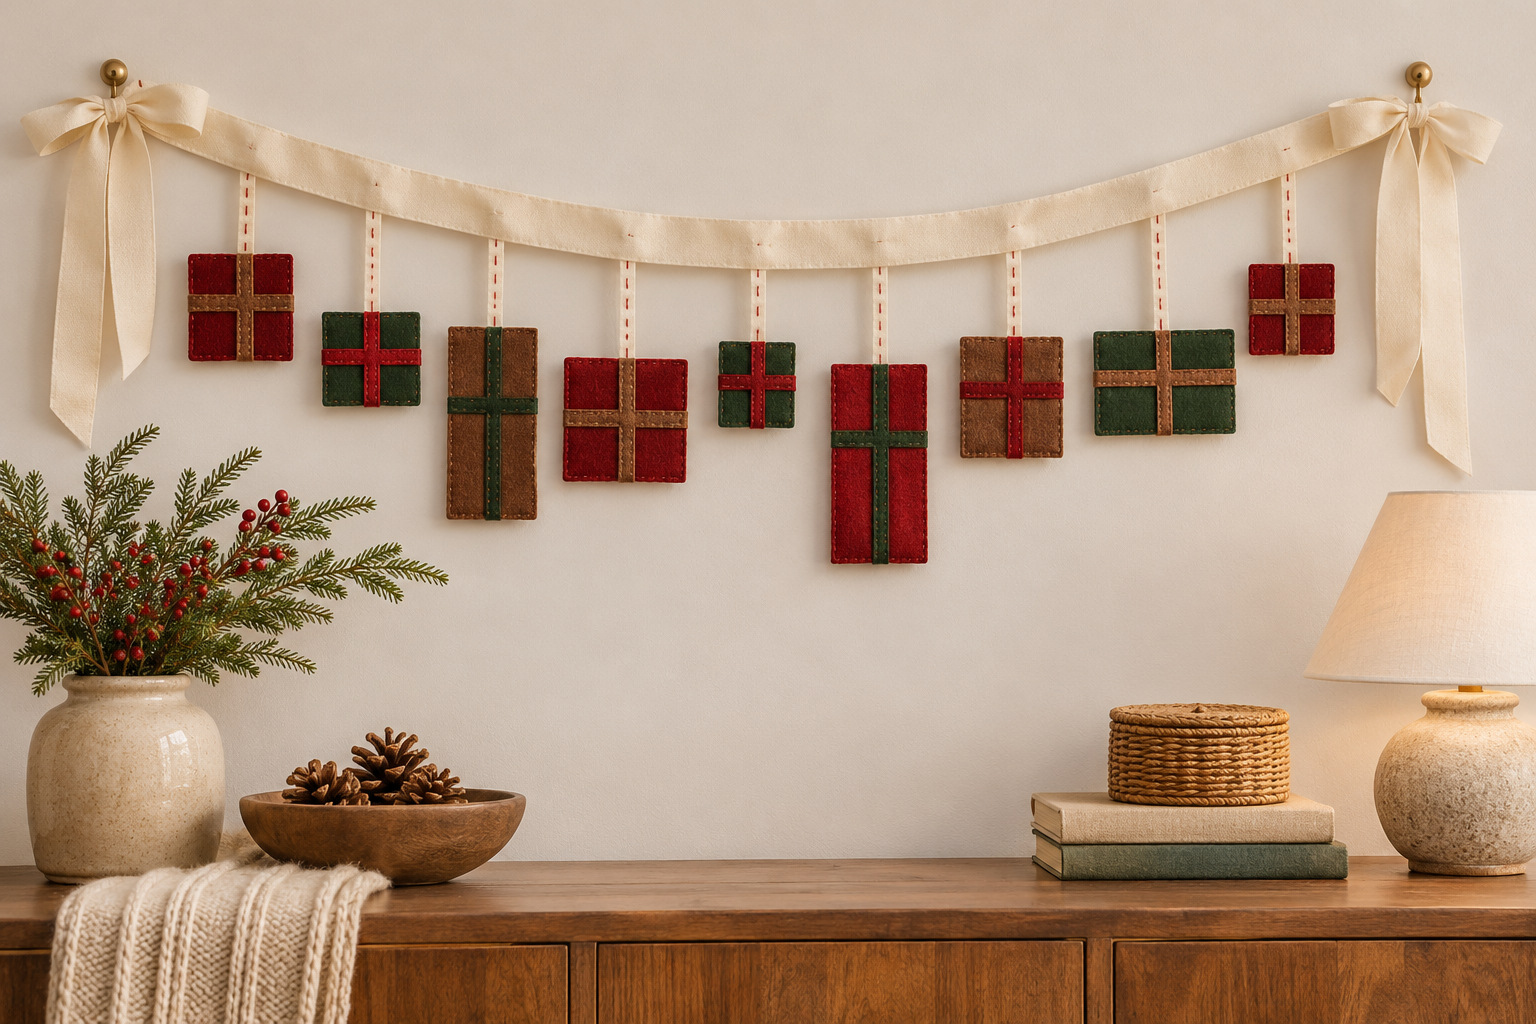
Start with broad square or rectangular felt shapes and add two narrow contrasting strips across each one. The crossed strips suggest gift ribbon, so the present remains recognizable without a separate miniature bow. Keep those details flat if you want a garland that stores easily.
For a little volume, join two matching outer panels and add only a small amount of craft stuffing before closing them. Keep the supporting loop attached to the main body rather than to an applied decoration. Test one completed present on the ribbon before making the rest.
Hang the pieces from short individual attachments beneath a wide supporting ribbon. Slightly different box proportions can be more interesting than many extra colors. Put the display on a wall where the squares remain flat and do not catch on a door or projecting cabinet handle.
12. Keep Gingerbread Figures Flat and Simple
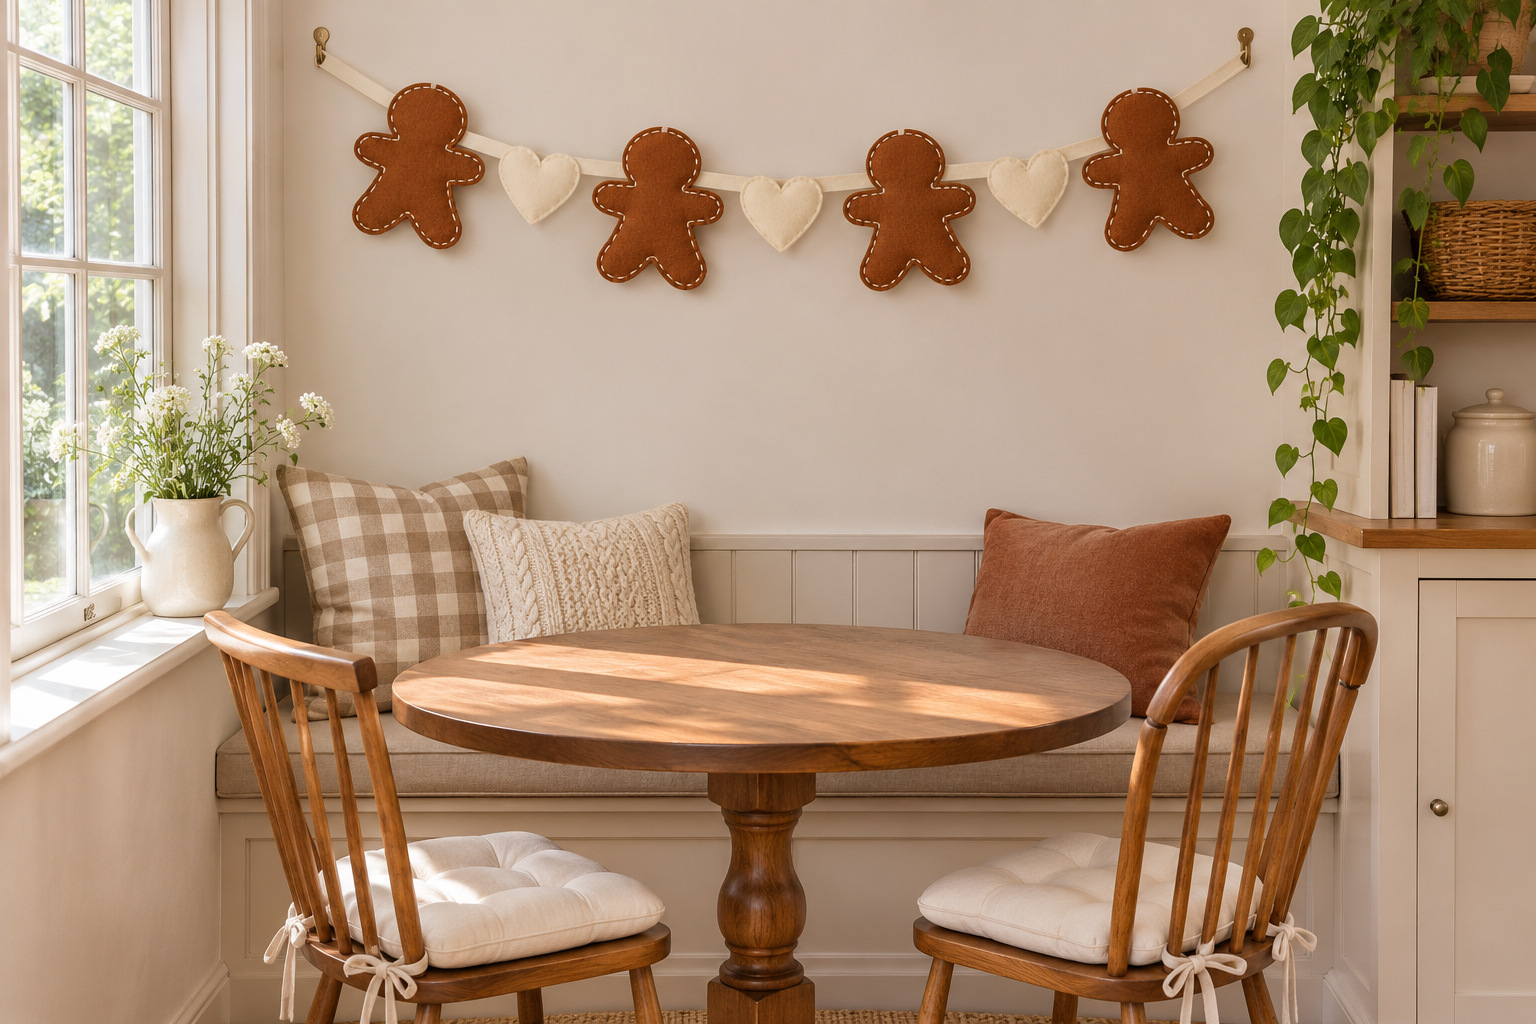
A gingerbread silhouette needs a generous head, short arms, and broad legs to remain readable in felt. Draw your own plain figure on paper and test the outline at the size you will actually use. Cut the felt slowly around the inner corners so the arms and legs stay connected to the body.
Add a stitched cream outline or a few simple thread marks. Keeping the decoration flat leaves less to snag when the garland is handled. If you use applied felt details, make them large enough to attach securely and follow the adhesive or sewing method you have chosen.
Try warm brown figures on an ivory tape with an occasional plain heart between them. Hang the row above a kitchen breakfast area, well away from cooking heat, splashes, and food preparation. It is a decorative textile display, not an edible garland or a toy.
13. Fold Felt Bows Around the Main Cord
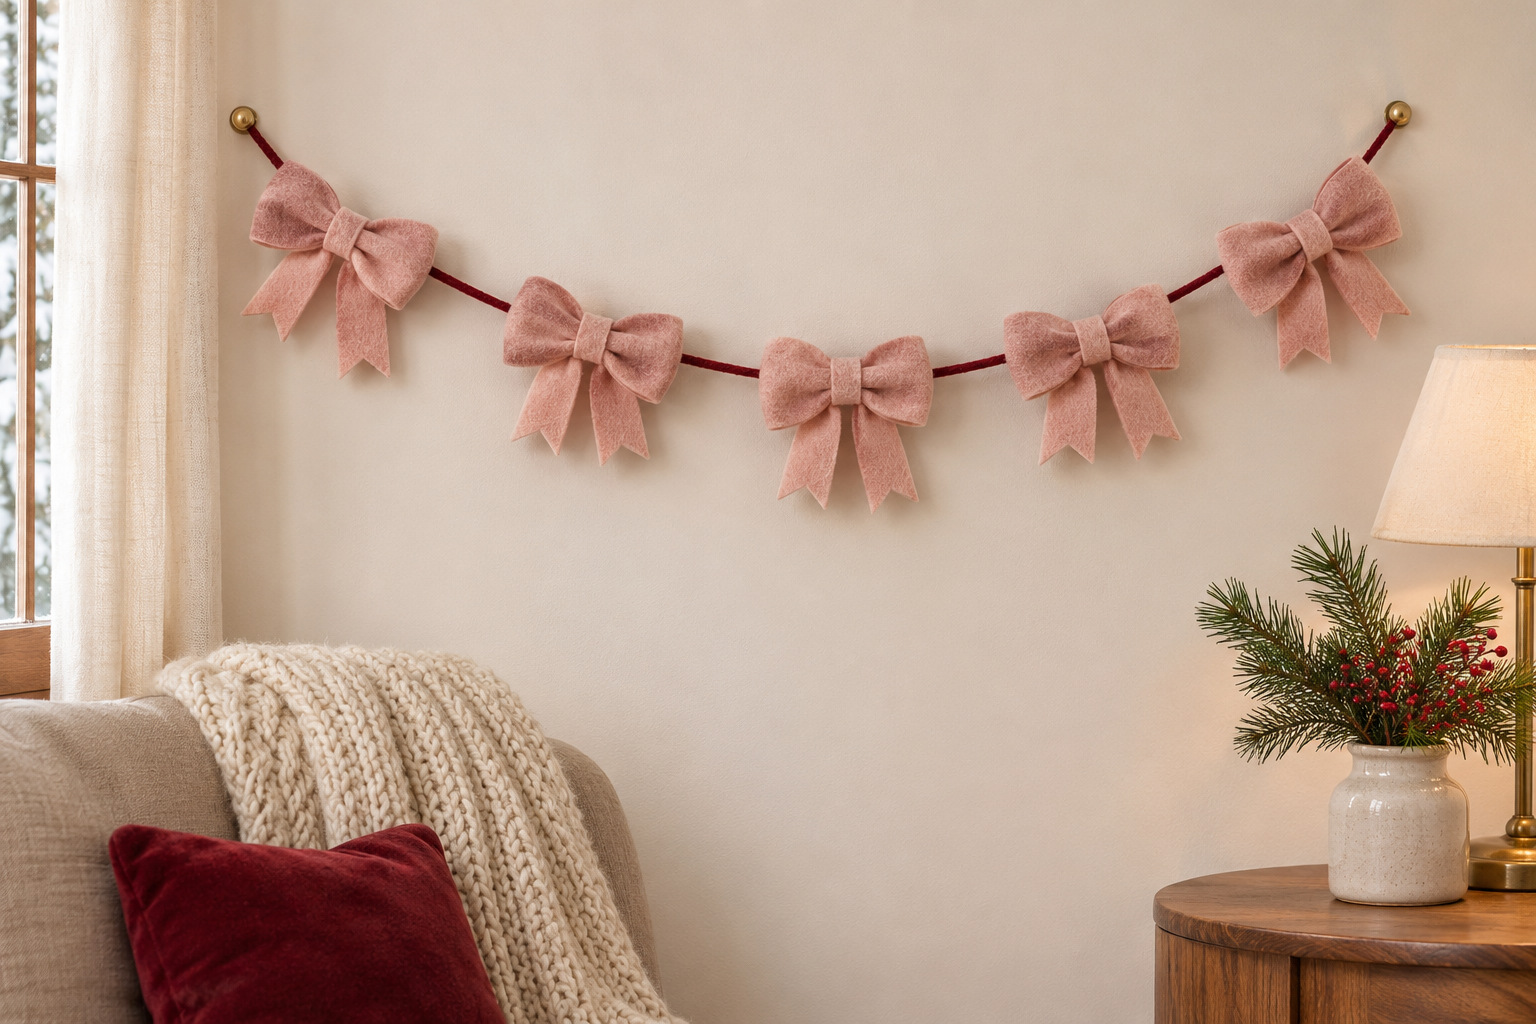
Cut a broad felt rectangle and pinch the middle into a bow shape. Wrap a narrow matching strip around the center and secure it so the folds hold. Make one sample first: a very stiff felt gives a crisp bow, while a softer piece makes rounder loops.
Attach each bow to the supporting cord at its center. Keep the tails short enough to show the folded shape instead of turning the strand into a heavy fringe. Leave enough space between bows that their outer loops do not overlap when the cord dips.
Muted blush bows on a deep red cord can give a plain cream wall a small festive detail. The folds create the interest, so there is no need to add glitter, lettering, or another ornament to every center. Check the finished line from the normal viewing distance before making it longer.
14. Roll Two Felt Colors Into Peppermint Rounds
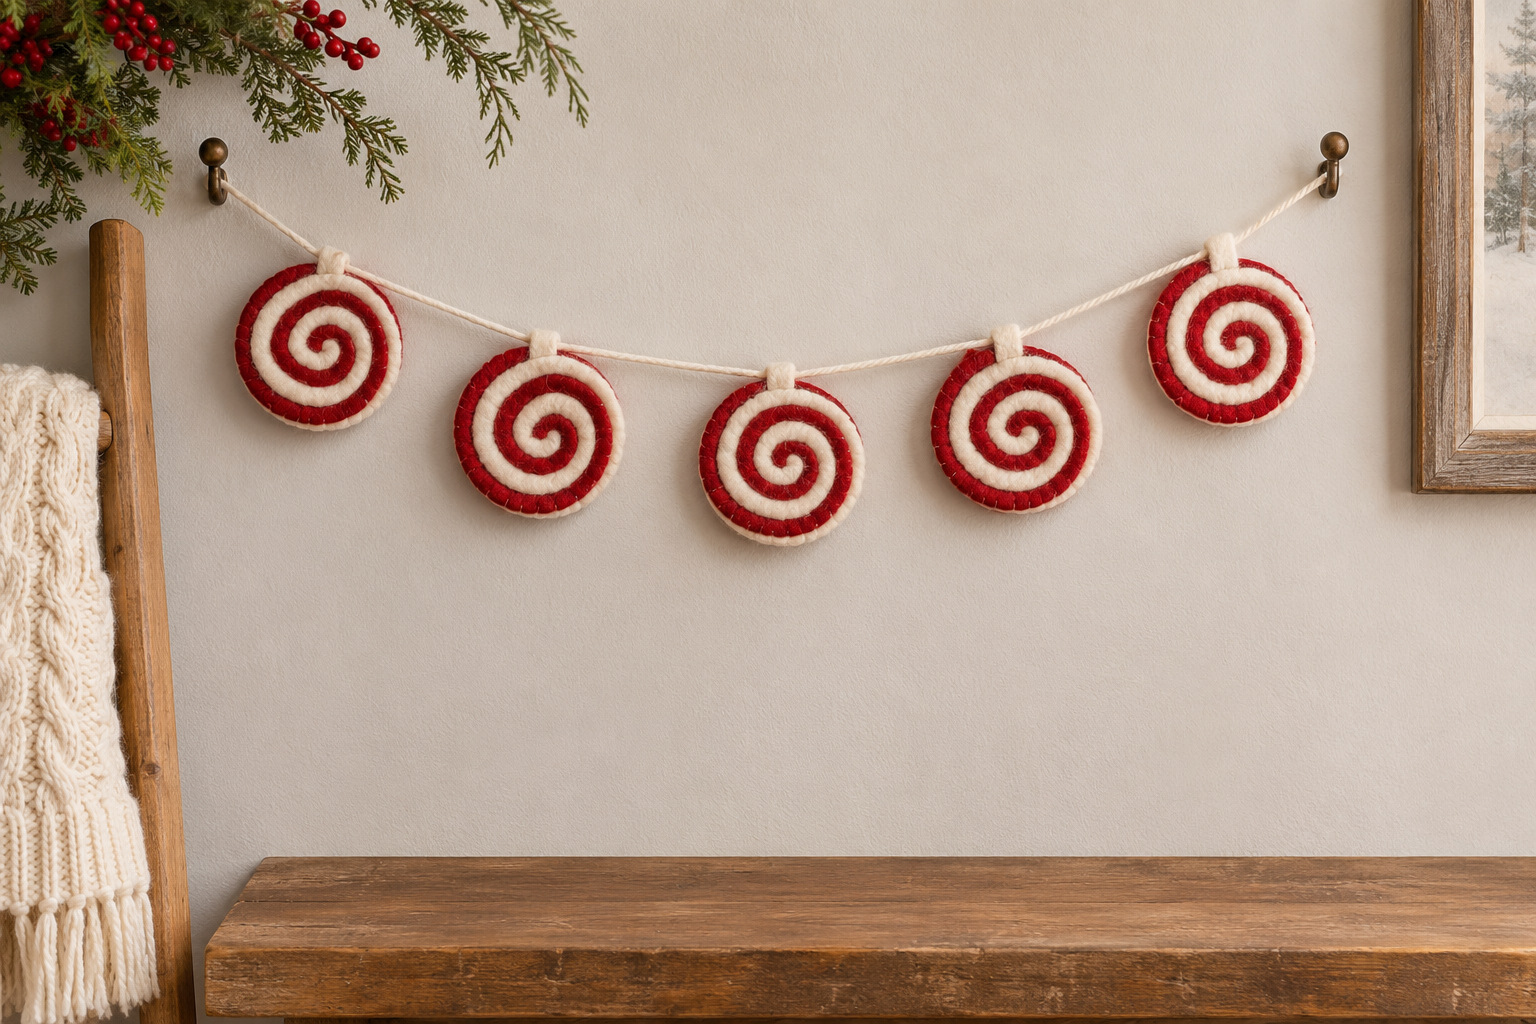
Lay two narrow felt strips together and roll them into a flat spiral, keeping their long edges aligned. Test the thickness before cutting a full batch. A small amount of contrast is enough for the spiral to read; cream with red gives a recognizable peppermint effect.
Secure the outer end and the layers with stitching or a fabric adhesive suitable for the material. Let adhesive dry completely before testing the round as a hanging piece. Attach a short support to the outer body so the spiral stays together rather than relying on one loose inner layer.
Space the rounds along a plain cord and hang the strand where their flat faces remain visible. Keep the rest of the display simple so the spiral pattern is easy to see. These are felt decorations, so store them separately from real sweets.
Make a short sample in the actual felt before committing to a long garland. Choose one construction you enjoy, repeat it clearly, and stop when it suits the available wall or furniture line. After Christmas, inspect the joins and let the pieces lie flat or wrap loosely around a clean storage board, with the cord secured so it cannot tangle around the shapes.
Discover more from HomeTrendora
Subscribe to get the latest posts sent to your email.